The Contacts Manager provides your organisation’s management and customer administration team members with a method to grant or revoke roles to other team members within your organisation and its purchaser organisation.
When your organisation’s customer record is first created in the Portal, only those individuals requested as per the TUKR (or via discussions with QuantityWare) are granted roles in the Portal. This screen allows those with “Management” or “Cust. Admin.” Roles to delegate roles to other trusted team members (and revoke roles from team members no longer requiring access).
You can access the Contacts Manager as follows:
The screen is loaded and is displayed as shown as below:
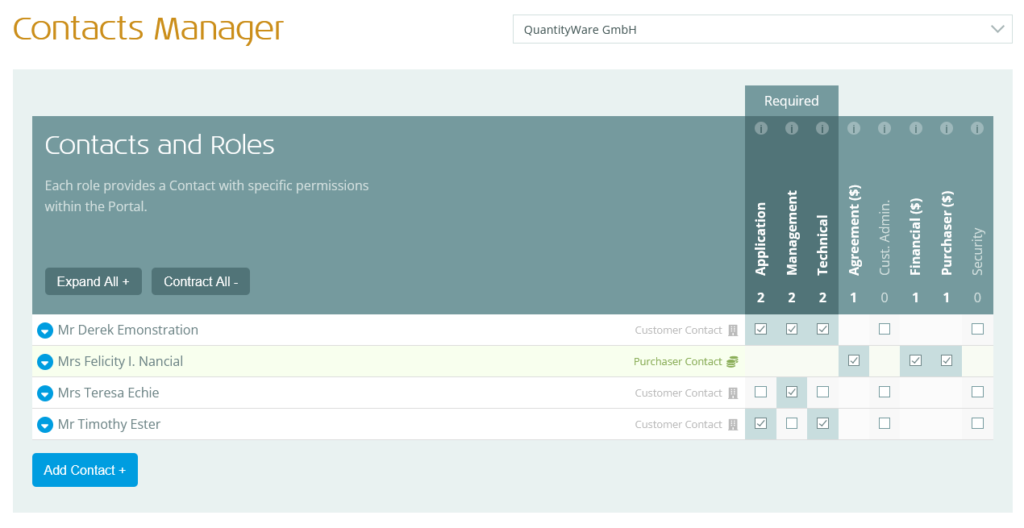
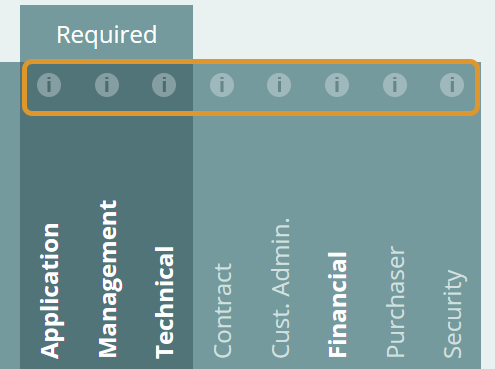
Each “Contact” (team member) within your organisation, which currently has one or more Roles within the Portal is shown on this screen, along with the Roles they have been granted on the Portal.
Contacts from your organisation and the purchaser organisation are differentiated as follows:
Customer:
![]()
Purchaser:
![]()
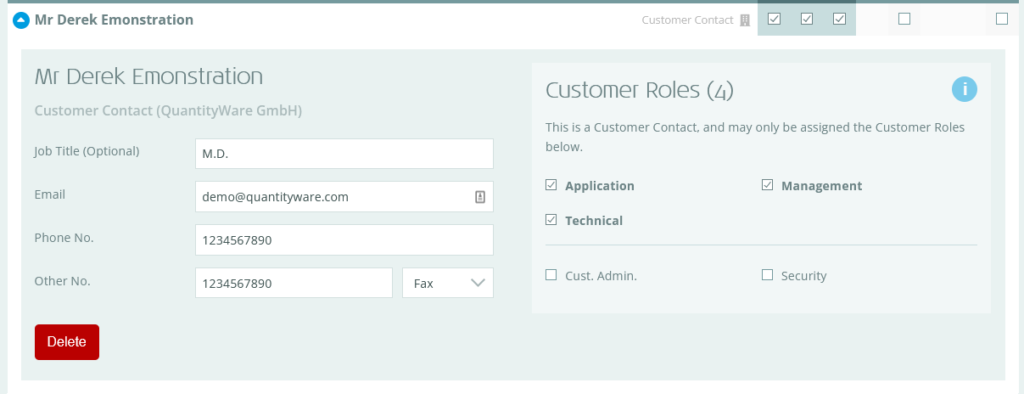
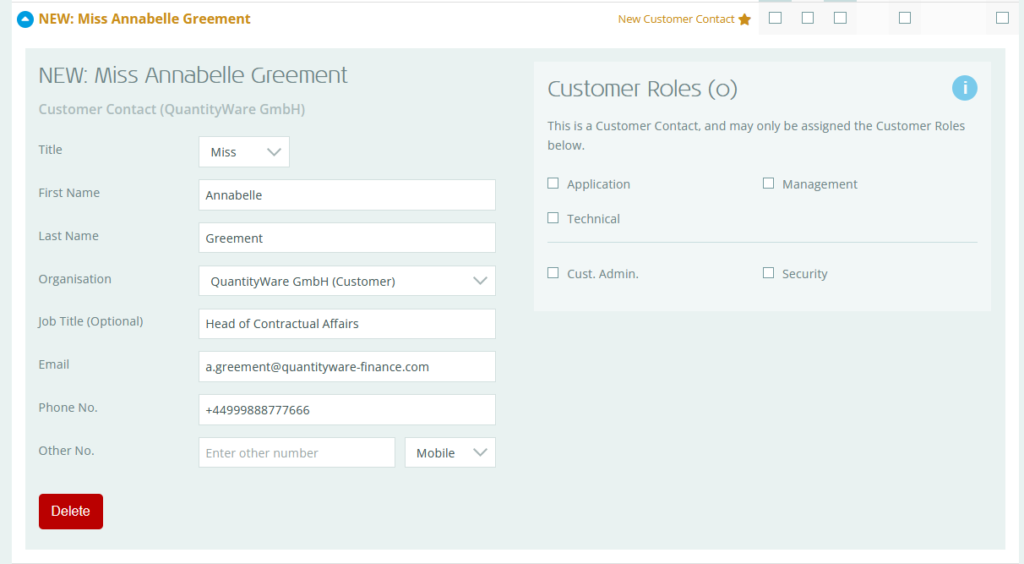
Clicking on any of the Contacts’ names will display the Contact’s Customer details, including email address and phone number, and provide more details on the Roles that are available.
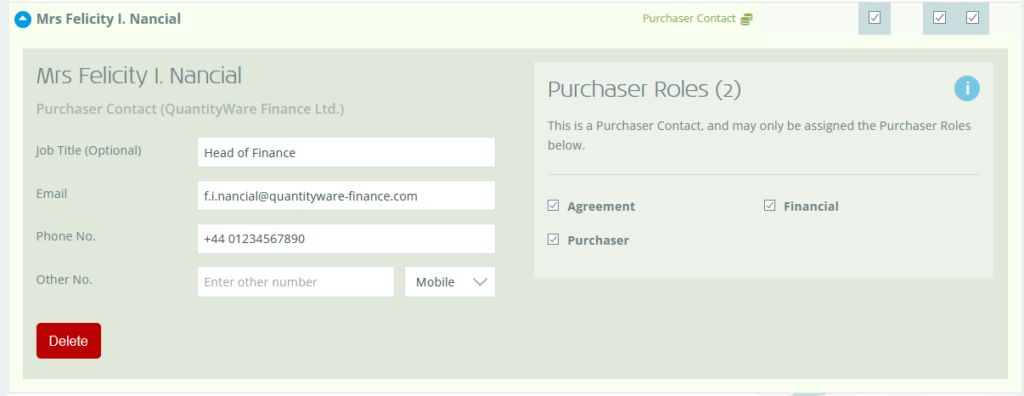
Available Roles depend on whether the Contact is for your organisation or the purchaser organisation.
Customer Contact:
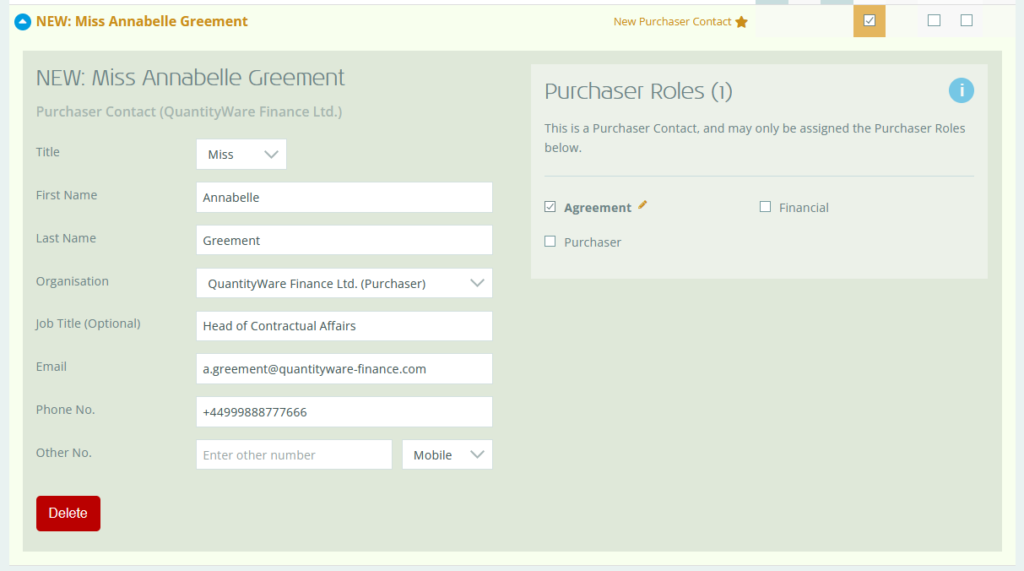
Purchaser Contact:
Each Contact has a specific set of Contact details for the Customer/Purchaser, which can be viewed / edited within the Contacts Manager by expanding a Contact and viewing / editing the appropriate fields (Customer example below):
Each Role grants a set of permissions related to a job role within an organisation.
Roles are added to / removed from Contacts by simply clicking the relevant check box, either in the Contact summary:
![]()
Or in the Contact expanded details:
Multiple Roles can be assigned to one Contact, although we recommend maintaining a clear separation of duties within your organisation.
Roles are set as either Customer or Purchaser Roles, and are only made available to relevant Contacts.
Further details on Portal roles and the access provided for each are shown in Portal Roles.
Each Role has the following key properties:
To view the above details of each Role by clicking the information icon above each Role column:
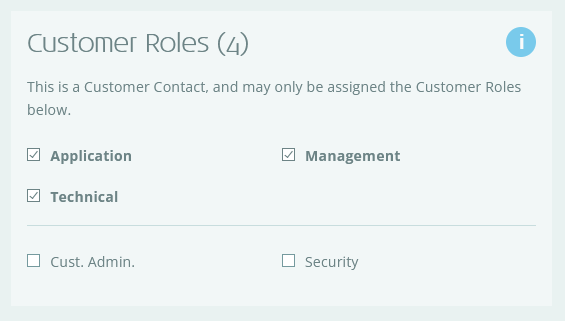
To view a list of all Roles’ information, select the “All Roles…” button above or, from a Contact’s details, click the information icon:
![]()
Learn more about Roles on the Portal Roles page.
To add a Contact to a Customer, click “Add Contact”, enter their details, choose whether they are from your organisation or the purchaser organisation, and select at least one Role.
Initially they will be assigned to your organisation:
If you change the Organisation from your organisation to the purchaser organisation:
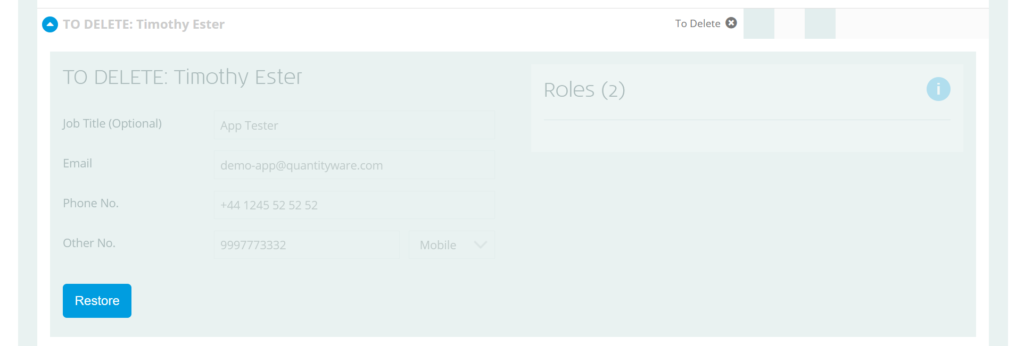
To remove a Contact from a Customer, click on the Contact in the list to view its details, and click the “Delete” button. This will flag the Contact for removal:
The Contacts Manager allows you with the flexibility to request any changes to your organisation’s contact roles – from editing existing contact roles to adding new team members and removing team members form the Portal.
Once you have made all required changes to the contact roles for your organisation:
Your Contact changes will be validated and, if there are no issues, a ticket will be automatically raised with the QuantityWare team requesting your changes.
After a few moments the page will refresh, and you’ll see a message to confirm that your request has been sent, along with a link to the Ticket itself (should you wish to add any further comments).
Additionally, you will receive an email to confirm that your ticket has been raised with the QuantityWare team. You can view the ticket at any time via the SupportCentre.
Whilst waiting for the request to be confirmed, the Contacts Manager will show a read-only list of the existing, active contact roles and the requested contact roles:
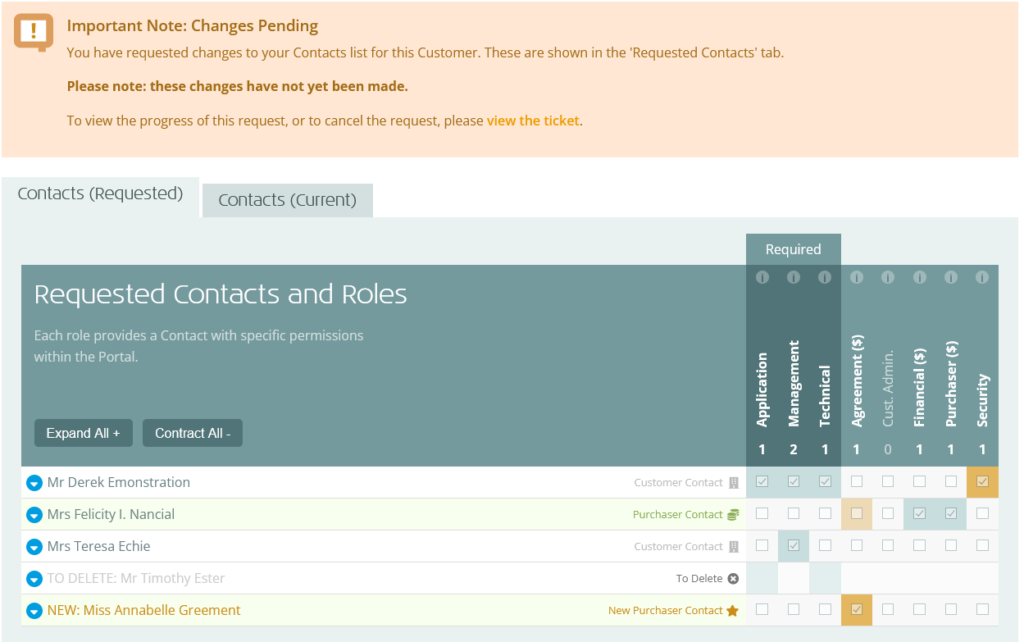
In the example above, we performed the following request:
The QuantityWare team may have queries relating to your request. If they do, they will reply to your ticket and you’ll receive an email notification. You can reply to the ticket via the SupportCentre to respond to any queries. After any queries are resolved, the QuantityWare team will confirm the implementation of the request.
You’ll receive a confirmation email when the contact roles change request has been implemented. Any new team members included in your request will have Portal user accounts created, and a “welcome” email will be sent to their email address (with a link to activate their account).
If you made an error in your original request, you can either add a comment to the ticket to explain the error and request a change or cancel the request before raising a new one. To cancel the request:
The Contact Changes ticket will be displayed.
7th July
Standards Update: ASTM D1250
21st April
The QuantityWare Guide to Hydrogen
20th April
BCG Certification Training 2026 completed
25th March
BCG Certification Training 2026
12th February
Standards Update: ISO 6578