Systems Manager Overview
The Systems Manager is your hub for viewing and generating your BCP and BCG usage keys, through the maintenance of your organization’s QuantityWare systems and SAP installations.
This guide will describe how usage keys work, how to maintain your system records (and obtain usage keys), and how to manage your SAP installation records.
QuantityWare Usage Keys
How Keys Work
Usage keys are designed to only work on a single System of a single SAP Installation (and, for Systems where individual Clients are allocated to separate organizations, Client) specified.
Each key is also either for BCP or BCG, though both a BCP and BCG key can be applied to a system if you are using both pieces of software.
We allow our customers to add systems in order to generate and obtain usage keys via the Systems Manager within the Portal (with some limitations, as described below).
Key Expiration
Usage key expiration is directly linked to the current “agreement validity expiry”.
-
- For test agreements, this is the end date of the test agreement
- For productive agreements, this is the end date of the last paid-for yearly/quarterly period*
* When the invoice for the next period of your agreement is paid, any previously added systems will automatically have usage keys generated / extended accordingly.
Limitations
- SAP Installation numbers are selected from a previously approved list
- This reduces the chance of error when adding new systems, and helps speed up system addition
- You can request new SAP Installations via the Systems Manager (see Requesting a New Installation below)
- You may only add systems up to the system limit
- This is set based on the scale of your QuantityWare agreement
- You can request system limit increases if required
Adding Flexibility
As usage key expiration is tied to your organization’s agreement, extending them is responsibility of your organization’s financial representatives.
However, to provide some flexibility to your organization’s technical contacts, the following exceptions have been put in place:
- If usage keys are about to expire on a test agreement, technical contacts may request a test agreement extension via a special button in the Systems Manager
- If configured for your organization and if usage keys are about to expire on a productive agreement, we allow a one-off 28 day “emergency extension” of all productive usage keys. This can be performed with a single click in the Systems Manager *
- Special 28-day “trial usage keys” can be generated for software that you don’t currently have a productive agreement for– for example, for BCG if you currently have a productive agreement for BCP
- These allow you to try out our alternative software solutions alongside your current productive software
- Once generated, you can request extensions of these trial usage keys using the “Request Trial Usage Key Extension” button within each system’s details.
* Note: for Subsidiaries of a Global customer, emergency key extensions must be performed by the Global customer.
Accessing the Systems Manager
You can access the Systems Manager as follows:
- Click “Customer” in the navigation menu
- Select “Systems Manager”
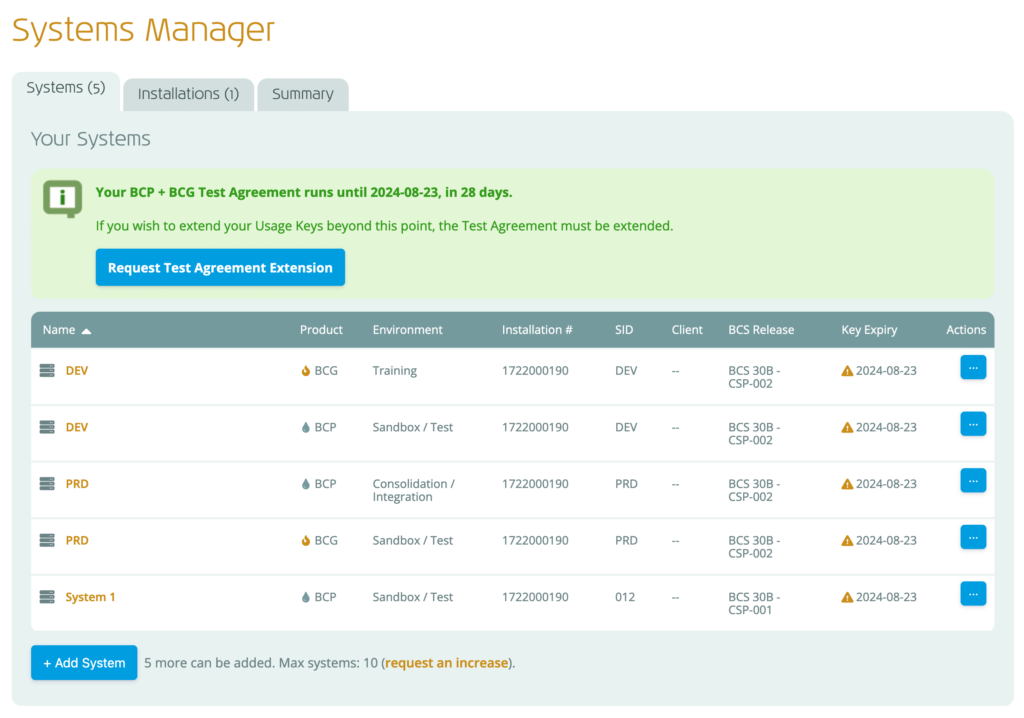 The Systems Manager will load, as shown to the right, with the following tabs:
- Systems – View your list of systems and view their usage keys. Add new systems and request usage key extensions (for “trial” systems and when on a test agreement/contract only). Details of your agreement and any key expiry warnings are displayed above the systems.
- Installations – View the list of approved Installations for your organization, delete unused installations and request additional installations
- Summary – View an overview of your organization’s usage keys and installations, further details of the agreement/contract status and the productive software.
Managing Systems and Keys
To manage your systems and usage keys, use the “Systems” tab of the Systems Manager.
Here, you see a list of your existing systems, which you can use to do the following:
- Add new systems + generate usage keys
- View usage keys
- Edit system information
- Delete systems
- Request trial keys (for trial systems)
Each system record will display a status icon and description, to help you easily identify systems with expiring / expired usage keys, those with trial usage keys, etc.
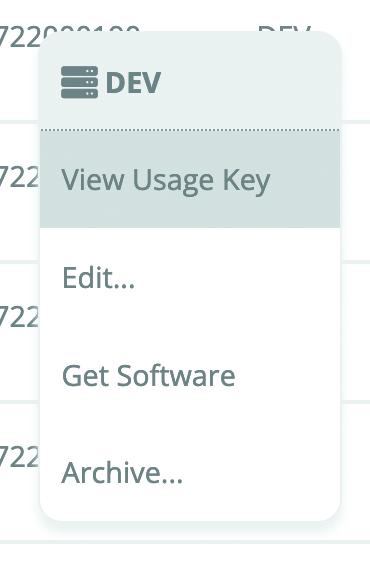 Clicking on each system will open a pop up containing the BCP or BCG usage key for that system, and right-clicking on each system (or clicking the action button) will show a context menu (see right) that allows you to:
- View the key
- Edit the system details
- Go to the DataLounge (in a new tab) to get the relevant BCS software for that system
- Archive the system
Adding a New System / Usage Key
If you have appropriate access, and your system limit has not yet been hit (if it has, see Requesting a Systems Limit Increase below), you can add new systems and receive a usage keys using the Systems Manager.
To add a new system:
- Click the “+ Add System” button (at the bottom of the existing systems list)
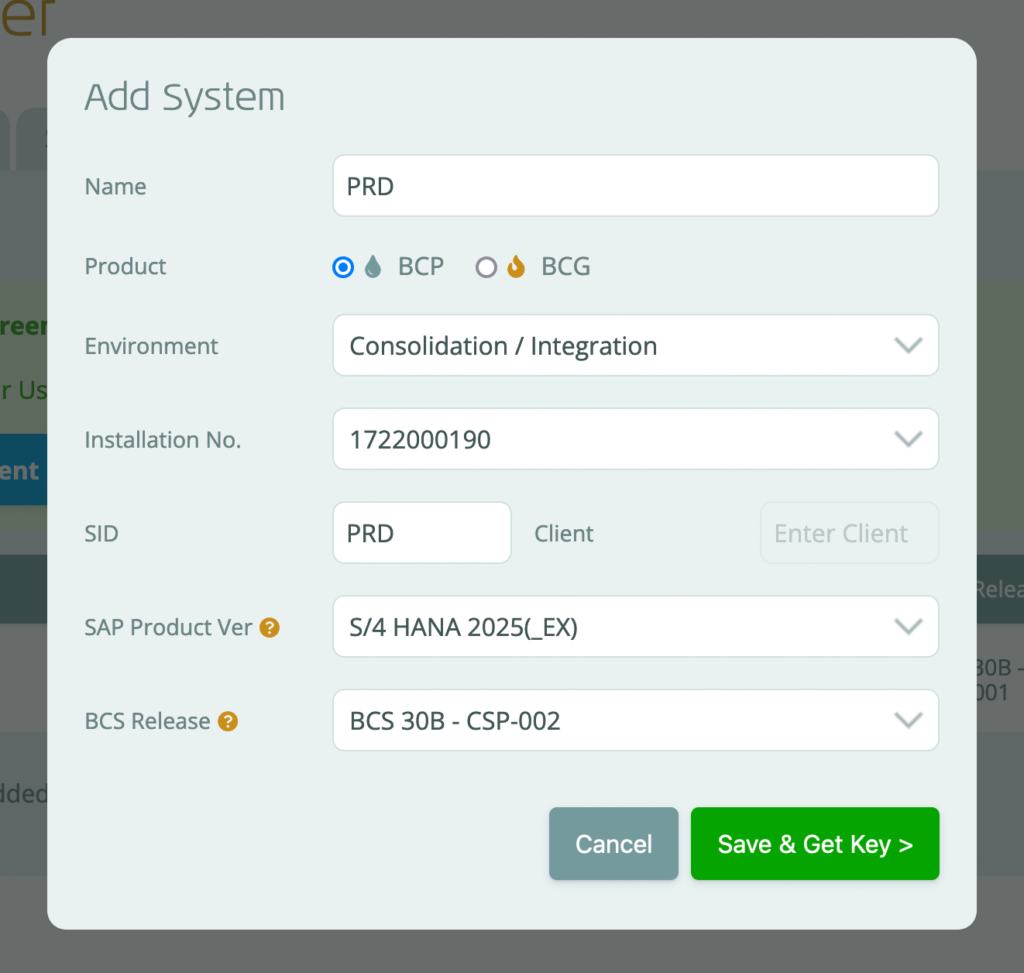 A pop up will be displayed with the required information to add a system and generate a usage key:
- Enter a system name (to help identify it)
- Select a product (BCP or BCG)
- Choose an environment from the list
- Select the system’s Installation from the list
- Enter the system’s 3-character SID
- Select the SAP product version (used to determine which BCS releases are available)
- Select the BCS release installed (required to ensure we can provide the most accurate support, and to help ensure the correct software is available for download on the DataLounge)
- Select if the system contains your “Client 045” (learn more here), and which client it is on (if not 045)
- Click “Save and Get Key“
The details you entered will be validated and, if successful, the Portal will add the system to the Systems Manager, and show you the usage key for this system (see Viewing a Usage Key below).
New Trial System?
- If, after changing the product, you see a “New Trial System?” note, this is because your current agreement/contract with QuantityWare does not cover that product.
- Before proceeding, please view the Trial Usage Key section below.
Installation not in List?
- Only those installations that QuantityWare have approved will appear in the list.
- If you need to add your system to a new installation, you’ll need to request the installation first.
- You can’t add the new system until this is done.
- Click the “Cancel” button for this system, then go to the “Installations” tab and follow the instructions in the Requesting a New Installation section below.
Viewing a Usage Key
To view the usage key for an existing system within the Systems Manager:
- Click the relevant system (anywhere on the system record)
A pop up will appear containing the usage key, the expiry of the key, and system details, as below:
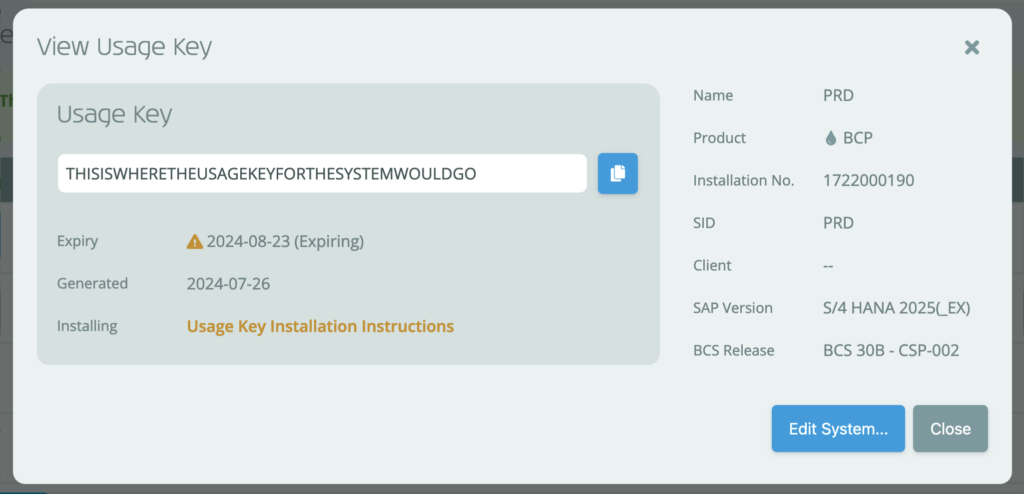
- Optionally, click the copy button to copy the usage key to your device’s clipboard.
How do I install a BCS product?
- To view instructions on how to install BCS products on your system(s), click “Usage Key Installation Instructions” in the View Usage Key popup.
Archiving a System
 To archive a system within the Systems Manager:
- Right-click the relevant system(anywhere on the system record), or click the action button (on the right of the system record)
The System’s context menu will be displayed.
- Click the “Archive…” option
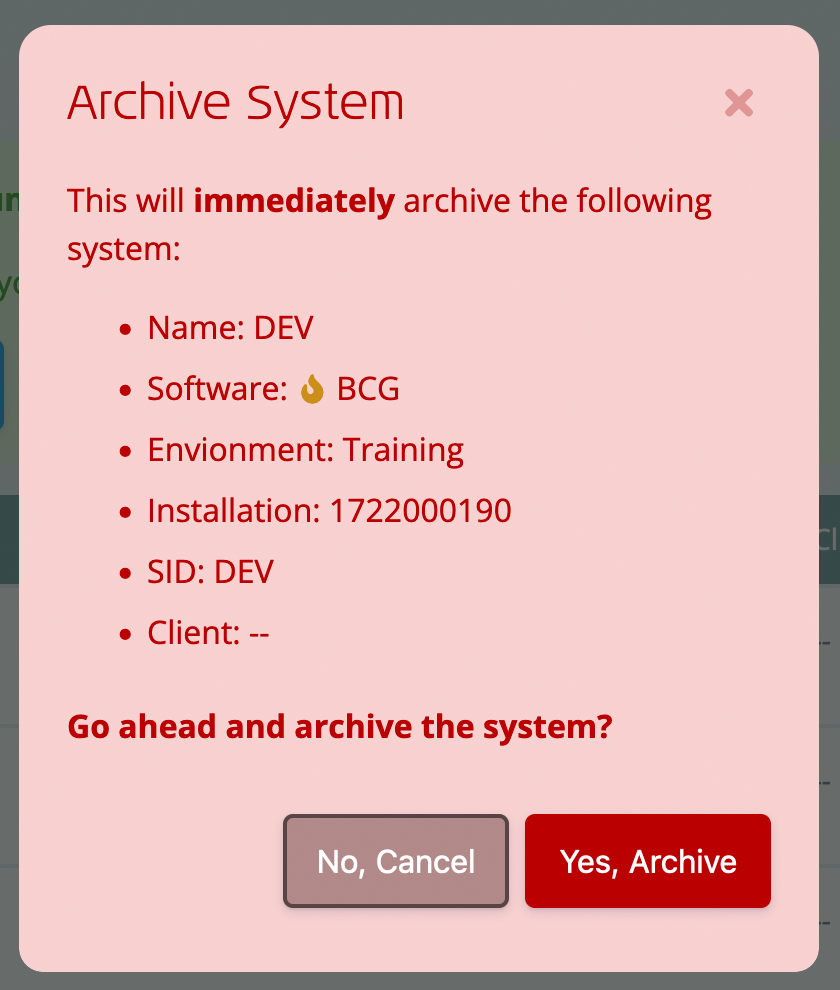
A pop up will appear, asking you to confirm the system’s removal (see right):
- Click the “Yes, Archive” option
The system will be immediately archived.
NOTE: This will have no effect on the usage key within your actual SAP system (it merely removes the system record from the Portal).
Maintaining SAP Product Version and BCS Release
You must specify the SAP Product Version and BCS Release for any new system added:
- SAP Product Version filters the available BCS Releases for selection, and is required to ensure your organization’s choice of BCS Release supports the system landscape.
- BCS Release is used as a filter in the DataLounge so that only relevant software / CSPs / notes are presented to you. It also assists QuantityWare in providing you with relevant support for your release of BCS.
We request that you keep these values up to date in the Systems Manager for these reasons.
Missing SAP Release?
For systems added to the Portal prior to August 2024, the SAP Product Version may not be specified in a system.
If this is the case, on attempting to view the usage key for the system in question will require that both the SAP Product Version and BCS Release are provided prior to display.
This will only be required once, and will ensure that your system records are as up to date as possible.
Extending Usage Keys
Extending Productive Usage Keys
There are two methods available to extend productive usage keys: performing a 28-day emergency extension yourself, or raising an Emergency Key Extension Ticket:
28-day Emergency Extension
 If configured for your organization, technical contacts may perform a one-off 28 day “emergency extension” of all productive usage keys – without requiring approval from QuantityWare.
This is done via the Systems Manager:
- Click “Customer” in the navigation menu
- Select “Systems Manager”
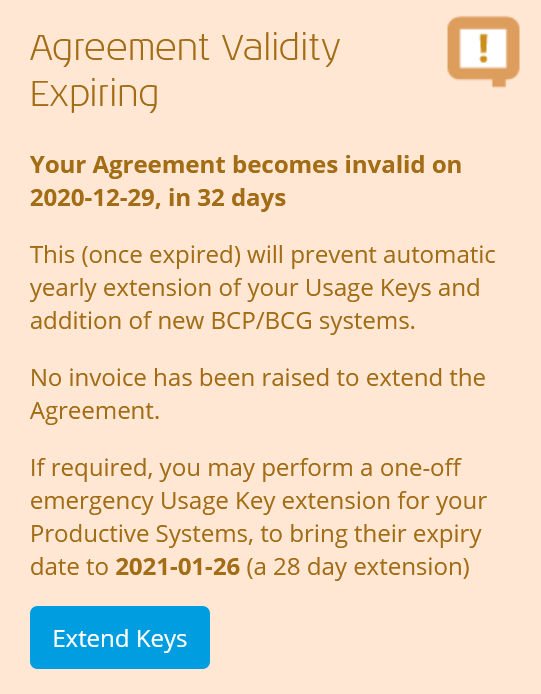
- Select the “Summary” tab
- Click “Extend Keys” within the “Invalid Agreement” notice (see right)
The portal will extend all productive usage keys on your system to the emergency extension date, and reload the page.
To view your new usage keys, click the “Systems” tab and click on each system as required.
Don’t see the “Extend Keys” button?
If you’ve already performed a one-off emergency extension for the current expiry, you will not be able to make another (you’ll see a note stating that you’ve already made the emergency extension).
However, you will be able to raise an Emergency Extension ticket to request an extension from QuantityWare (see below).
Emergency Key Extension Ticket
If usage keys are about to expire on a productive agreement, technical contacts may raise an “Emergency Key Extension” ticket.
This method is always available, and requires review and approval from QuantityWare to activate the extension.
To do this:
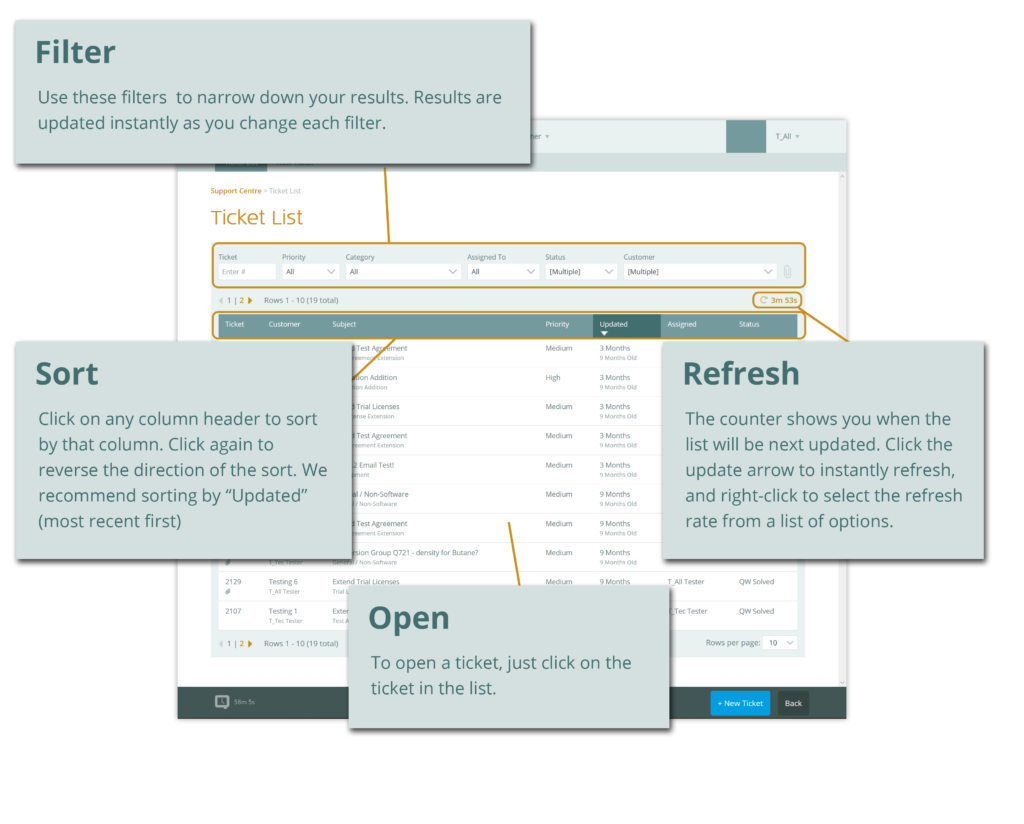
- Go to the SupportCentre
- Click the “+ New Ticket” button
- Choose the “Emergency Key Extension” category
The Emergency Key Extension ticket will be shown. By default, the requested expiry is set to 28 days from today’s date.
- Modify the “Requested Expiry” date as required
- Enter the reason for your extension request. Please be as detailed as possible.
- Click “Submit Ticket”
If the QuantityWare team have queries relating to your request, we will reply via the ticket. After any queries are resolved, the QuantityWare team will confirm their decision.
You’ll receive a confirmation email explaining the decision, and if your request is approved your agreement will be extended and your usage keys will be extended also. All contacts with the technical role will receive an email that the updated usage keys are available within the Systems Manager.
Extending Test Agreement Keys
 Testing of QuantityWare BCS may take longer than the 28 days that our test usage keys are valid for.
To support this, we allow your organization’s technical contacts to request an extension of the test agreement, and corresponding usage keys.
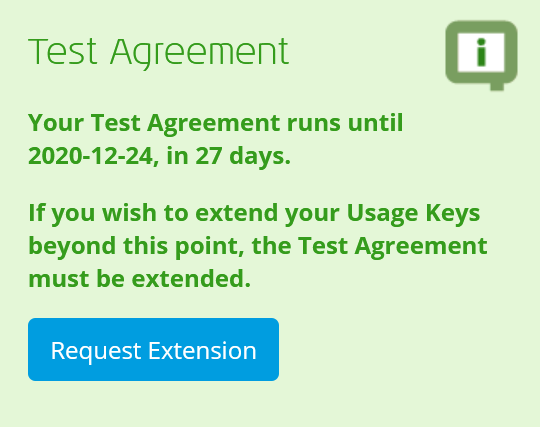
When viewing the Systems Manager for a customer with a test agreement, you will a message like that on the right on the “Summary” tab (also seen above the systems list in the “Systems” tab):
- Click the “Request Extension” within the “Test Agreement” notice
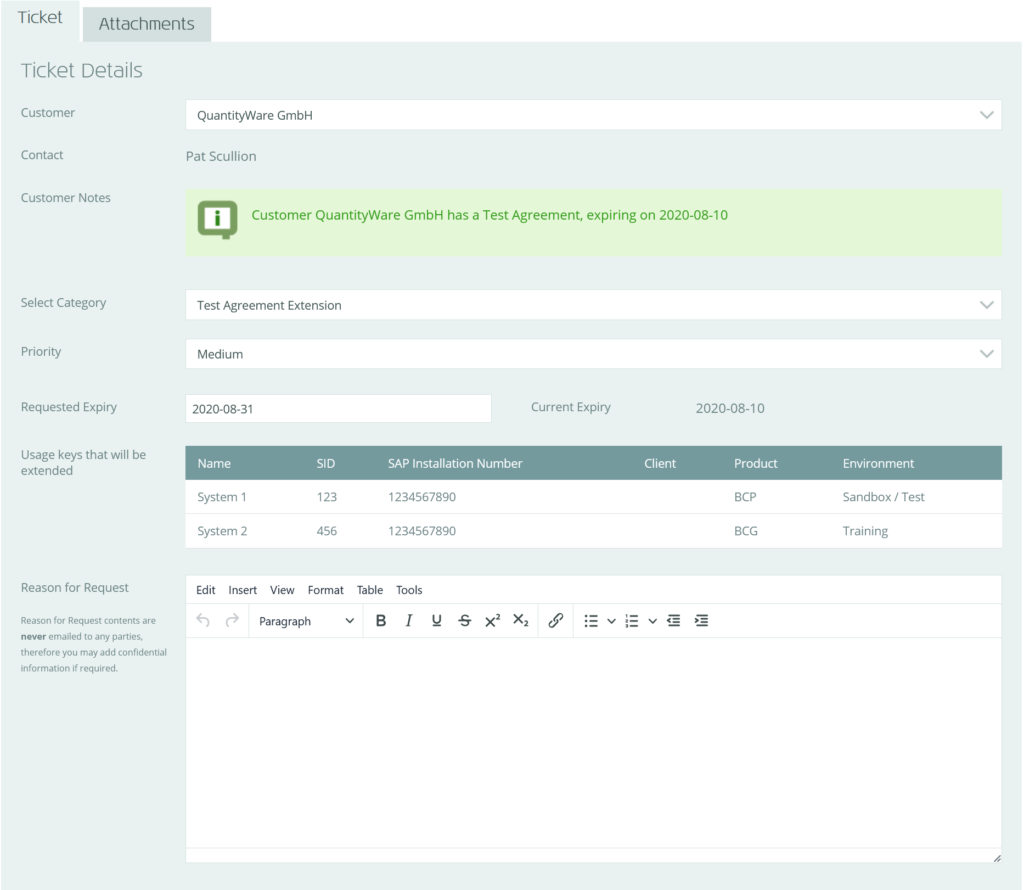 This will create a draft “Test Agreement Extension” ticket, listing existing systems for your organization (see right). By default, the requested expiry is set to 28 days from today’s date.
- Modify the “Requested Expiry” date as required
- Enter the reason for your extension request. Please be as detailed as possible.
- Click “Submit Ticket”
If the QuantityWare team have queries relating to your request, we will reply via the ticket. After any queries are resolved, the QuantityWare team will confirm their decision.
You’ll receive a confirmation email explaining the decision, and if your request is approved your agreement will be extended and your usage keys will be extended also. All contacts with the technical role will receive an email that the updated usage keys are available within the Systems Manager.
Uploading Installation Test Results
On completing the installation of QuantityWare BCS on your “client 045” client, you must run an Installation Test to ensure that it was successful, and export the test summary to a PDF.
Then, the PDF should be uploaded to the Systems Manager so that QuantityWare can review and confirm the results, to enable full application support.
This is done using the “Installation Test Results” tab, which initially will show a warning icon to indicate the installation test results are not uploaded:
- Click the “Installation Test Results” tab
- Click “Upload for Review…” for the relevant system
- Select your file and upload it
The file will be uploaded, and a ticket will be raised with QuantityWare to review and confirm the results. If we have any questions, we’ll be in touch with you via the ticket.
Once QuantityWare has confirmed all Installation Test results, the “Installation Test Results” tab icon will turn into a green tick.
No Systems Are Shown?
QuantityWare customers who joined prior to September 2024 may not have their Client 045 system specified (this has been able to be specified in the TUKR since September 2024).
To do this:
- Click “Select Client 045 Systems…”
- Click “On this system in” for your “Client 045″system
NOTE: If you have both BCP and BCG on this system, both the BCP and BCG instances of the system will share the same “Client 045” settings
- If your Client 045 is installed on a client other than 045, select your Client 045 location.
- Click “Save Changes”
The changes will apply immediately.
Managing Installations
Requesting a New Installation
To ensure the usage key generation process is reliable and to reduce the chance of errors, you may only add systems for those installations already added to your organization’s Portal records.
However, if you need to add a new installation, this can be done by requesting it using the process below.
To request one or more new installations within the Systems Manager:
- Click the “Installations” tab
- Click “+ New Installation”
A new blank installation will be added to the Installations list, along with a “Reasons for additional installation(s)” text field.
- Enter your installation number
- Enter a description of your installation
- Repeat the above steps for each installation you require
- Enter a description of your new installation(s) and why these are required. This will help QuantityWare understand your requirement and allow us to make sure your current agreement scale / complexity level is accurate, prior to granting your new installation(s).
- Click “Save Changes”
Your new installations will be validated and, if there are no issues, a ticket will be automatically raised with the QuantityWare team requesting your changes.
After a few moments the page will refresh, and you’ll see a message to confirm that your request has been sent, along with a link to the Ticket itself (should you wish to add any further comments). Additionally, you will receive an email to confirm that your ticket has been raised with the QuantityWare team. You can view the ticket at any time via the SupportCentre.
The QuantityWare team may have queries relating to your request. If they do, they will reply to your ticket and you’ll receive an email notification. You can reply to the ticket via the SupportCentre to respond to any queries.
After any queries are resolved, the QuantityWare team will confirm their decisions regarding each requested installation. You’ll receive a confirmation email explaining the decision(s), and each installation that was approved will now be available within the Systems Manager, listed in the Installations tab and may have new systems added against it – and usage keys generated as required.
Deleting an Installation
You can only delete installations if they are not currently in use by any of the systems for your organization. Deleting an installation will make it no longer available to any of the systems you add for your organization, so only delete those you are sure you will no longer require.
To delete an available installation within the Systems Manager:
- Click the “Installation” tab
- Click the “Delete” button for each Installation you wish to remove
- Click “Save Changes” in the Action Bar
Trial Usage Keys
If your organization has a productive agreement/contract with QuantityWare, this is for one of the following QuantityWare products:
- BCP (Bulk Calculations – Petroleum)
- BCG (Bulk Calculations – Gas)
- BCS (Bulk Calculations Solution, which covers both BCP and BCG)
If you have a BCS productive agreement, you may add systems and obtain productive usage keys for both the BCP and BCG software. If you have a BCP or BCG productive agreement only, then you may only add systems and obtain productive usage keys for the BCP or BCG software respectively.
However, we offer a way for you to “try out” our alternative software solutions alongside your current productive software. This is performed via a “Trial Usage Key” of the non-productive software.
Trial Usage Key Characteristics
- Trial usage keys expire 28 days after generation
- Trial usage key expiry dates are not linked to your agreement’s validity expiry, so do not automatically extend whenever your agreement validity is extended
- If your organization chooses to purchase the software you are trying out, and the agreement/contract is modified to support this, any trial usage keys for your organization will be immediately converted to standard productive usage keys and extended to the current agreement validity expiry.
Obtaining a Trial Usage Key
To obtain a 28-day trial usage key, just follow the standard steps to add a new system (see Adding a New System above) but select the software that you do not currently have a productive agreement for (e.g. if you have an agreement for BCG, select BCP).
The only difference in process will be that your environment choices are limited to Development and Sandbox / Test.
Extending a Trial Usage Key
Trial usage keys may be extended on request, as follows:
- Click “Customer” in the navigation menu
- Select “Systems Manager”
- Click the “Systems” tab
- Click the relevant trial system (anywhere on the system record)
The trial system’s usage key dialog will appear ,which features a “Request Trial Usage Key Extension” button.
- Click the “Request Trial Usage Key Extension” button
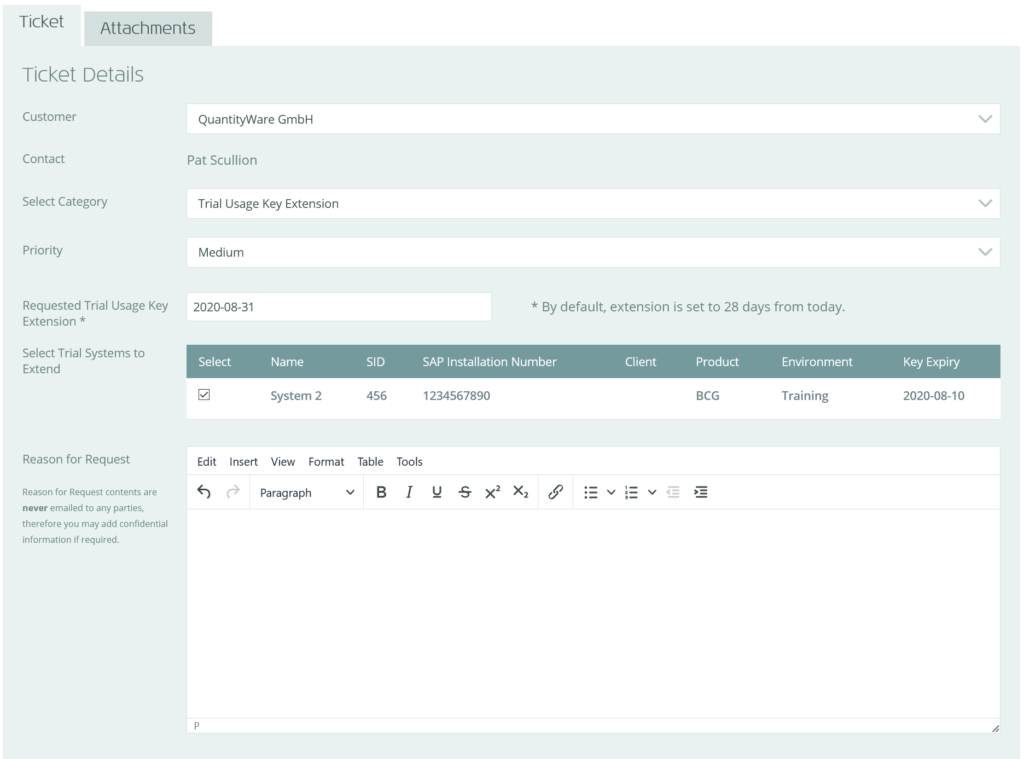 This will automatically create a draft “Trial Usage Key Extension” ticket, which will list all existing trial systems for your organization (see right).
By default:
- The “Requested Trial Usage Key Extension” will be set to 28 days from now
- The system you selected in the Systems Manager will be selected for extension.
- Optionally, modify the “Requested Trial Usage Key Extension” date
- Optionally, select any other trial usage keys you wish to extend
- Optionally, add any supporting documentation using the attachment upload interface in the “Attachments” tab
- Enter the reason for your extension request. You should specify as much detail as possible as more detail will help QuantityWare process your request quickly and reduces the chance of further questions prior to implementation of your request.
- Click “Submit Ticket” in the Action Bar
Your request will be validated and, if there are no issues, the ticket will be submitted to the QuantityWare team.
The QuantityWare team may have queries relating to your request. If they do, they will reply to your ticket and you’ll receive an email notification. You can reply to the ticket via the SupportCentre to respond to any queries.
After any queries are resolved, the QuantityWare team will confirm their decision. You’ll receive a confirmation email explaining the decision, and if your request is approved each trial system will have a new, extended trial usage key generated. All contacts with the technical role will receive an email that the new usage keys are available within the Systems Manager.
Requesting a System Limit Increase
To prevent misuse of the usage key generation system, the Portal initially limits the maximum number of system records that can be added for each customer. This is set to a level that matches the “scale” of your organization’s agreement/contract with QuantityWare and should offer more than enough flexibility to ensure all required systems can be added to the Portal.
If, however, you hit the system limit but need to add further systems, you may request a system limit increase by either raising a ticket with the “System Limit Change” category via the SupportCentre, or via the Systems Manager as below:
- Click the “Systems” tab
- Click “Request System Limit Increase” / “Request an Increase” below your list of existing systems
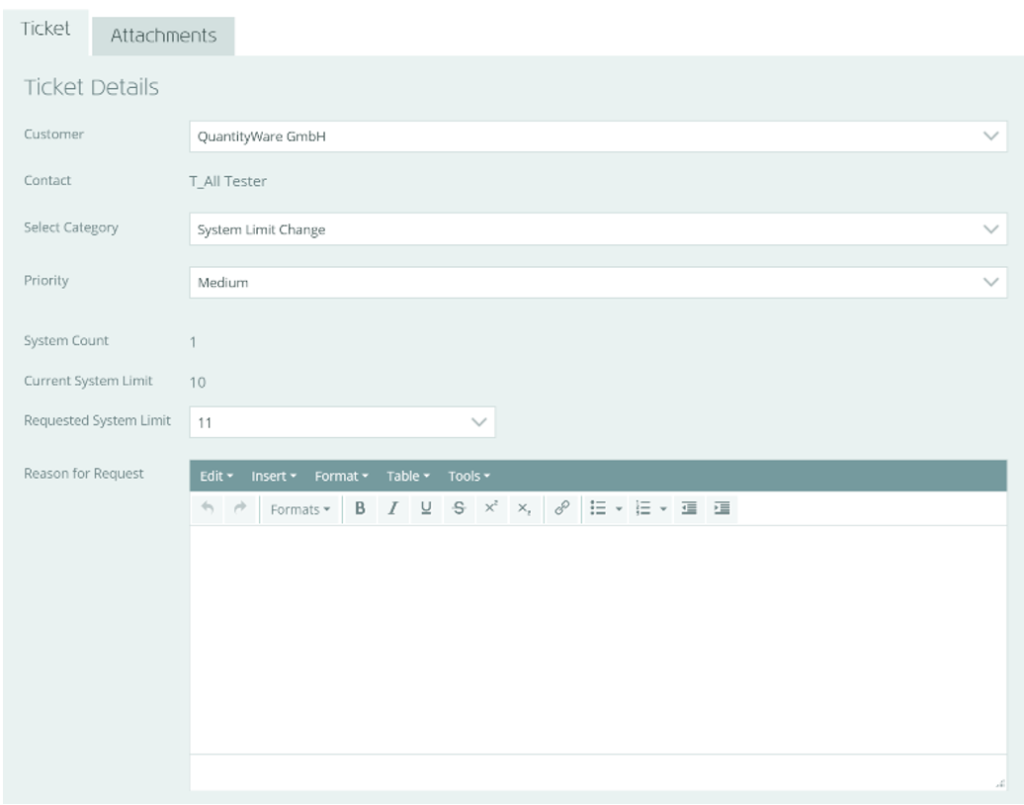 This will automatically create a draft “Systems Limit Change” ticket, which will display your current limit and the requested limit (see right).
By default, the requested limit is set to one greater than the current limit.
- Modify the “Requested Systems Limit” as required
- Enter the reason for your limit change request. You should specify as much detail as possible as more detail will help QuantityWare process your request quickly and reduces the chance of further questions prior to implementation of your request.
- Click “Submit Ticket” in the Action Bar
Your request will be validated and, if there are no issues, the ticket will be raised.
The QuantityWare team may have queries relating to your request. If they do, they will reply to your ticket and you’ll receive an email notification. You can reply to the ticket via the SupportCentre to respond to any queries.
After any queries are resolved, the QuantityWare team will confirm their decision. You’ll receive a confirmation email explaining the decision, and if your request is approved your system limit will be increased as requested.


 On first loading, a “Welcome” / “Continue Editing Questionnaire” message will be shown, providing some background on the questionnaire, and how it is used.
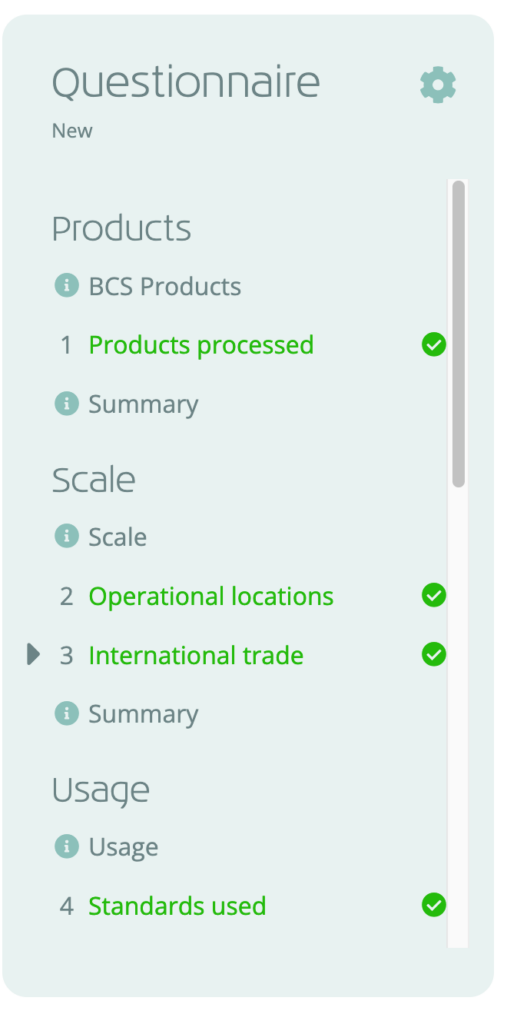 Along with the “Next” and “Back” buttons on each question, you can use the navigation menu to the right to quickly navigate between questions (see right).
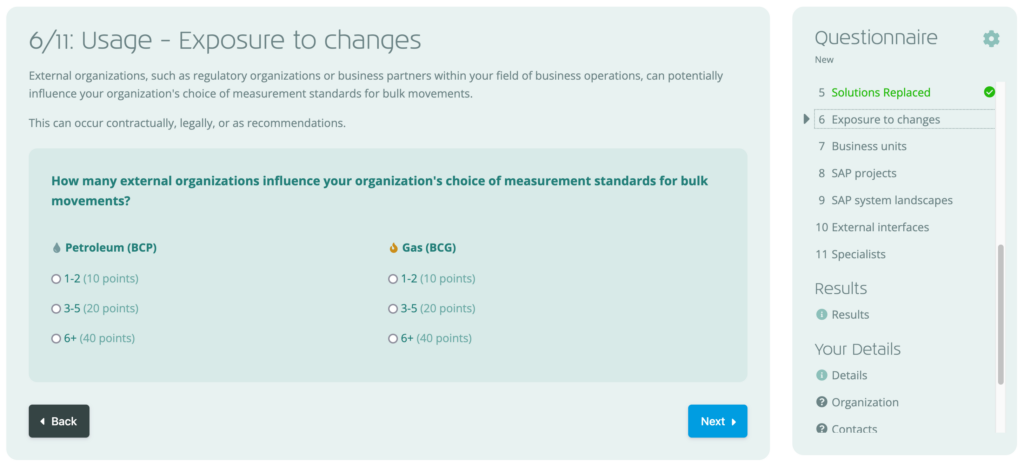

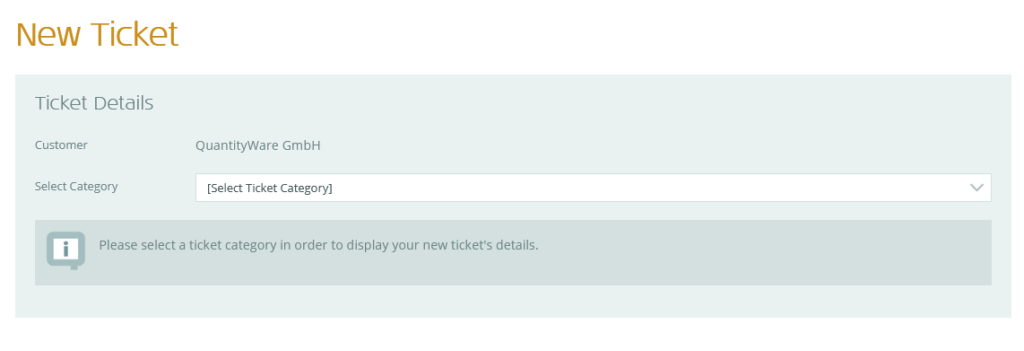 Create a new ticket, by doing one of the following:
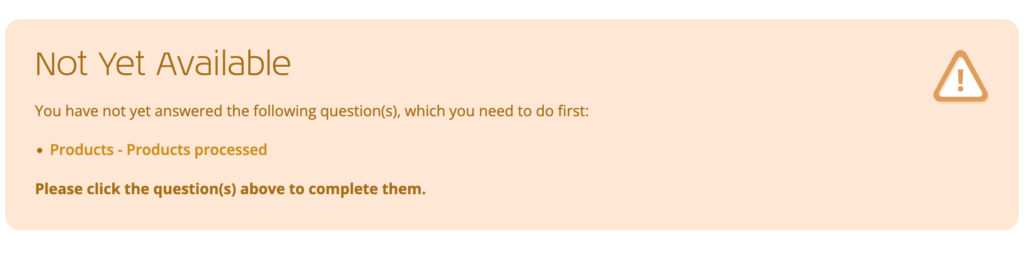
 The screen will refresh, and some additional information will be displayed (see left).
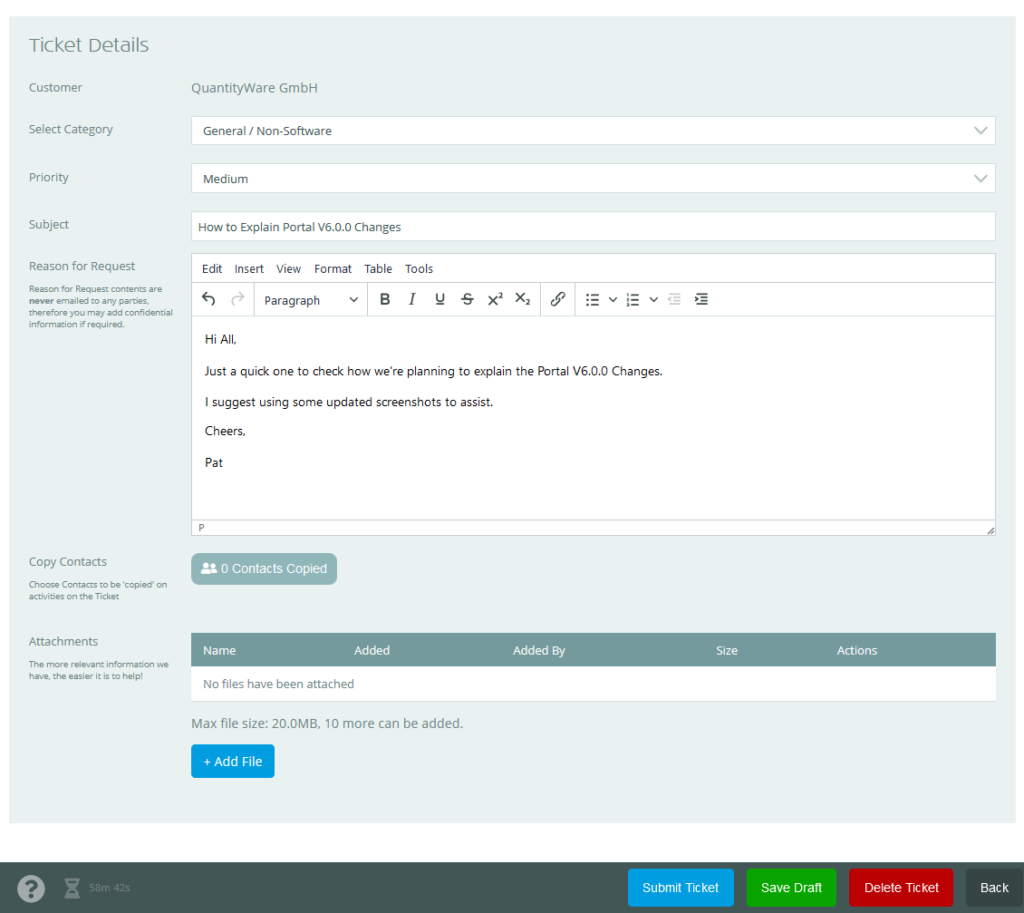
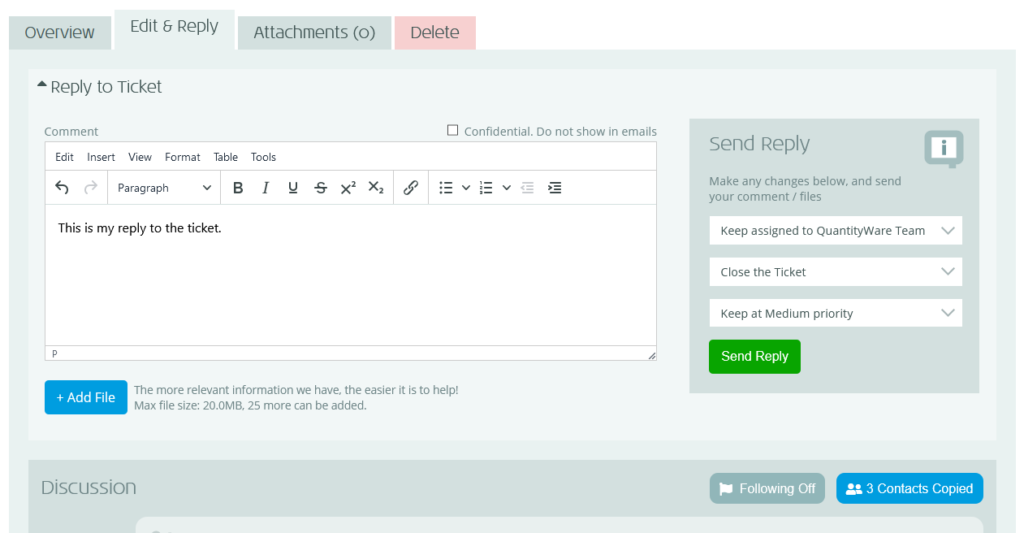
 The ticket will now open, ready for you to view, reply to and/or make changes to. There are various tabs, as shown below:
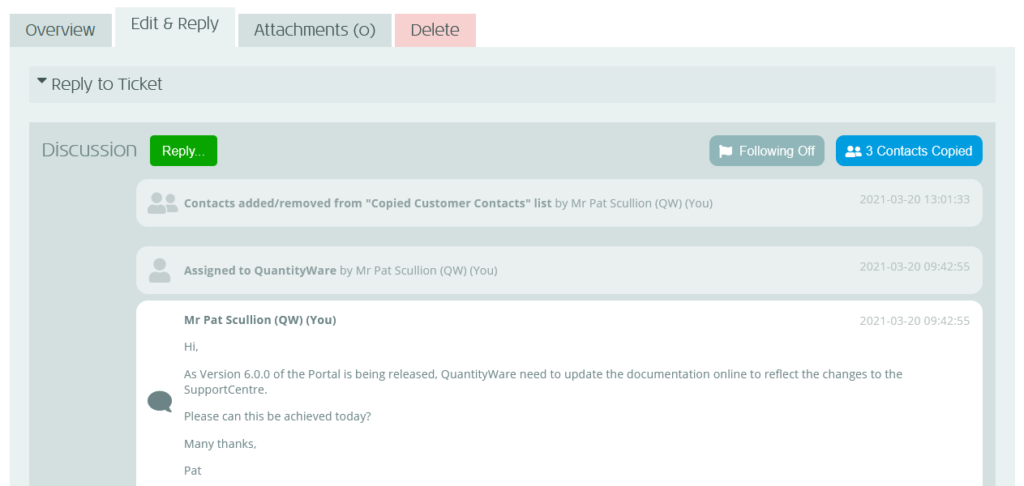
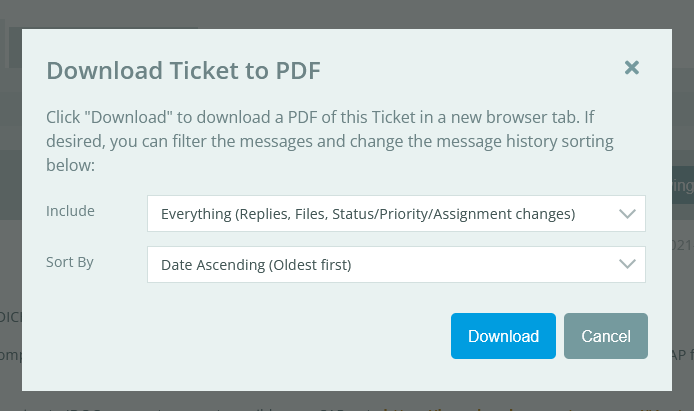 The “Download Ticket to PDF” dialogue will display (see right).